Tuesday, July 31, 2012

MeeMaa Day Camp


(My sister calls it Grandma Day Camp)  Each summer my sister and I get together and plan a day camp for the grandkids.  She has 4 and I have 7—4 of whom live here.  The other 3 just moved into their new house, so they won’t make it this year.  But we will mail them their stuff.  These pics are from last year...

To get this going, we have to decide on a theme—this year it’s an Olympic theme.  Then we have to figure out what to do for the t-shirts.  We have already tie-dyed, bleached, and hand printed.  This year we just let the kids decorate the shirts.

We always have to wait until its record-breaking heat—at least this year and last year.  That doesn’t go well for our outdoor stuff.  Probably no bike rodeo this year.  My sister lives on 10 acres and has chickens, so one day is always farm day.  She runs with a crowd that does animals—one year we went to see miniature horses, goats, a dairy farm and this year it’s back to a goat farm.  We see them milked and we are making cheese.  YIKES!!  Last year we also helped harvest honey—or the kids think we helped.  We all went home with home-grown honey! 

We start each day with a flag ceremony. 

We sing camp songs—some with bad words in them.  Where else do you get to sing the words ‘buttocks out!”  or “Glory, Glory what a hell  of a way to die!”? We do schedule a rest time—watching “Ernest Goes to Camp” is a favorite. 

My hubby makes an obstacle course in the back yard and the kids run thru it until they are tired.

Last year we did paper mache with the kids.  That was a huge mess, but very successful.  We made pigs—blow up a balloon and cut up an egg carton for the feet and nose.  Start putting paper mache.  The next day when it should be dry, you can paint.  But with the humidity, it takes at least 2 days to dry.  Then paint and let dry another day. 

This year we are making volcanos—it has nothing to do with the Olympics, but we’re doing it anyway. 

We are finishing up day camp with family day – an evening picnic at the park, making the volcanos erupt, and watching “Joseph and the Techni-Colour Dream Coat”
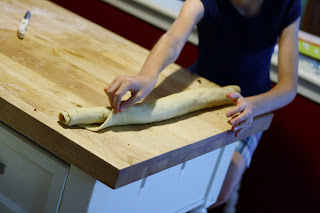
Wednesday, July 18, 2012

Home Canning!


One day my hubby came home from work with some peaches and blackberries.  He doesn’t work in the grocery business—he’s a property manager.  One of the neighbors that live in the apartment next to where he has been working gave them to him.  What to do, what to do… make Peach Jam!  After peeling the peaches—their skin came right off using the boiling water to ice water method, then I chopped them up. 
I’m always looking for a shortcut, so I chopped them with my pastry cutter.  I also cut eggs that way. 

 It turns out that you aren’t supposed to make double batches, so after two batches; I decided to just can the rest. 


Then, on to the blackberries.  We don’t like the seeds in jam, so I got out my handy dandy food thing—I’ve owned it for years, and haven’t used it but a few times.  Jocie, Kallie and Addie popped over, so I told them to be pioneer children and get to work.  We made four pints of the blackberry jam.  Both are very yummy—I’ve had pb &j sandwiches two days in a row with the new jam!!  On the down side, I’ve got man hands…..

Saturday, July 14, 2012

Cinnamon Rolls


One day, I realized that my grandkids don’t know my mom—she died when one of my daughters was a year old… She was known for her bread and rolls, so, it’s about time the kids learned to make cinnamon rolls. The camera work is iffy at best—but what else would you expect?  We started with the whole yeast is alive thing just to gross them out.  The girls measured, felt the water and did their own mixing and kneading. I almost forgot to give her recipe! 
Mom's Rolls

400° for 15-20 minutes


1 cup warm water
1 Tablespoon yeast
1/4 cup sugar
1/4 cup melted shortening (warm)  or oil
1 teaspoon salt
1 egg
3 cups flour

Put water, yeast, and sugar in a bowl. Let sit 5 minutes. Add shortening, salt, and egg. Mix completely.
Add 2 cups flour, stirring into liquid. Knead in remaining flour (add more if needed). Knead for 5 minutes. Cover and let stand for 1 hour. Punch dough down, knead for a few minutes, then form into shapes. If you are making cinnamon rolls, roll out and spread goop on, cut and arrange in pans.  Put onto greased pan. Cover and let stand 1 hour.  Then bake.


 Then due to lack of pics, we called Kate over to do take some.  After the first rising, we made the gobbely-goop for the inside. 
There is no recipe—you melt butter, add sugar, brown sugar and cinnamon.  Sometimes it’s wetter, sometimes it’s dryer.  Whatever. 


Then give your dough a big punch!

 Oops forgot and got the cast in it…oh well, it will cook out any germs, right? 

And P.S. she picked the jewels off her cast-- we had blinged it up!


Roll it out and spread the goop on it.


Roll them up!
  Cut it—I know you can use the thread method, but when else can kids use a sharp knife?

  I told them to cut them in about an inch wide—Kallie measures them with her fingers—the first two measure an inch.  She also knows how wide one finger is, also. 


 Arrange them in a pan, bake, ice – we usually have leftover icing in the freezer-- and eat.  Jocie licked her icing off her rolls and picked them to death on her way home.  No pic of that! MMmmmm!

Thursday, July 5, 2012

Ever Popular Flag Cake!


Yes, I am attempting the Flag Cake.  To gear up my confidence for this endeavor, my daughter had me look at this blog and this one also, and tried to talk me out of this.  I don’t decorate cakes, so she couldn’t understand the pull I had toward this cake!  I needed to make it!

Here is how it went… first borrow more round cake pans—I ended up with 6—if I do this again, I’ll just go for the whole 8.  Then I looked at the recipe—many of you would look at the recipe first, but this is how I get myself into this.  It called for 9 egg whites!  I’m not going to waste 9 eggs on a possible failure, so onto 2 cake mixes instead… Prepare your pans—spray them, put waxed paper in the bottom, and spray again!!

Then, separate out 2 cups of batter for blue.  I used almost 1 whole bottle of Wilton Paste food coloring to get this blue. 
I love their blue—my kids’ high school mascot was a blue jay, so I always have blue on hand.  If you use a lot of blue icing, you know that everyone eating the cookies will have blue teeth when they are done.  We’ll see about this cake.  After coloring the blue, I was supposed to stir in white sprinkles, but forgot, so I just shook them all over the top.  They do not fall into the middle of the cake, so if you forget the sprinkles, just leave them out.  Put the blue into the pan and start it baking. 
 
Then color the rest of the cake mix red.  This took one and a smidge more of the Wilton red.  A hint for getting good reds, is to color it and let it set a bit and let the color come on—it will deepen a bit.  I measured out the red by half cups into the rest of my pans and 2 bowls—so 7 red stripes in all. You have to spread out the batter—and make it smooth—the batter won’t spread and smooth itself!  That would have been good to know!

 Notice the paint cans in the background?  Yep, we're also re-doing the bathroom....
And making pickles out of the garden cukes!  Getting back to the cake...
All of my cakes came out easily and I baked them in batches of 3 and 4—the blue one takes twice as long.  I just have a normal oven and they baked just fine, except for being kind of lumpy.  Oh well, that’s what icing is for!

When completely cool, start to raise the layers… putting a good amount of icing between the layers.  I always use a cream cheese icing that I got off Paula Deen.   
When you get to the blue layer, I used a bowl to cut around it and the 3 last red layers.  Then the blue is the donut around the red center.  My blue only let 2 red layers in, so my flag only has 6 red stripes!  But I got to eat the other red layer.  Put the cake in the fridge until the icing is completely set before you ice the outside!!
 
When it’s all solid, you can bring it out and finish the icing. 
Then I decorated the top by whipping out my red, white and blue candy melt lump that I made years ago.  I only use it for the 4th of July, so the rest of the year I stick it in my fridge.  I try to be all that by using my potato peeler to try to make curls, but that never works, but I use whatever you call these things to decorate the top.


                                                  Now for the slice pic……


YIPPEE!!   SUCCESS!!

 And yes, the blue turned my teeth blue!

Monday, July 2, 2012

Patriotic Wreath


I have seen these wreaths made out of felt and more striped… and decided that I needed one, but made out of bandana print and a blue print.  I just buzzed on over to Wal-Mart and bought the fabric there.  The blue has fireworks on it.  Then I let it sit around the house for a couple of months until last night when I figured out that we were already in July and the 4th is really close.

Here’s the recipe for the wreath:

 1 yard of red

 ½ yard of blue.

Cut the fabric into 2” squares.  Only one of my rotary cutters won’t work.  It has a new titanium blade, and won’t spin.  No fear, go get the paper cutter.  Sure it has a nick in it, but you can just run over the uncut thread over and over again!


Then fold the little squares into diagonals, and pin onto the wreath form.  Keep doing that until you are mostly insane. 
Try to get the grandkid to help fold, and after she does about ten, she left and declared,“I’ve already done most of them.”


Keep going until you run out of fabric, and send someone out to buy more.  And after that run out of pins, and beg them off your daughter.  Run out of her pins and find that pin cushion that you have had since high school and use those pins up!


All finished—hang on the front door and forget it!  Only now I need to straighten it out and find my camera-- it's pathetic, but it beats this cell phone!


I gotta worry about that flag cake I get to attempt tomorrow!
pe='text/javascript'>